Wednesday 22 May 2013

Gamo air rifle testing - 100 meters

I have owned my Gamo Shadow 1000 air rifle for 5 years now.  Below is a video I made recently showing what the Gamo can do at 100 meters and 55 meters.  Also a look at how to maintain the rifle.


It wasn't all smooth sailing with this rifle.  The main spring broke at approx 2500 pellets (3 weeks of use).  I had the rifle repaired under warranty.  However, the people contracted by Gamo in NZ were known for being useless when it came to quality of work, and I found the rifle had changing point of impact after the repair.  It just wasn't the same.

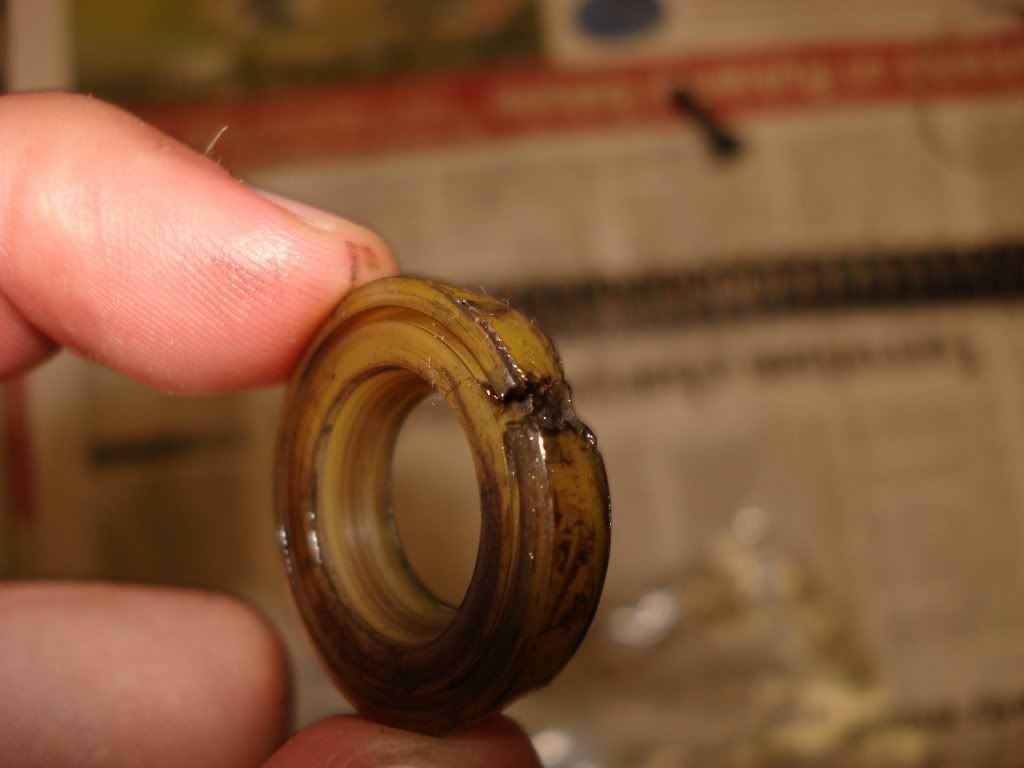
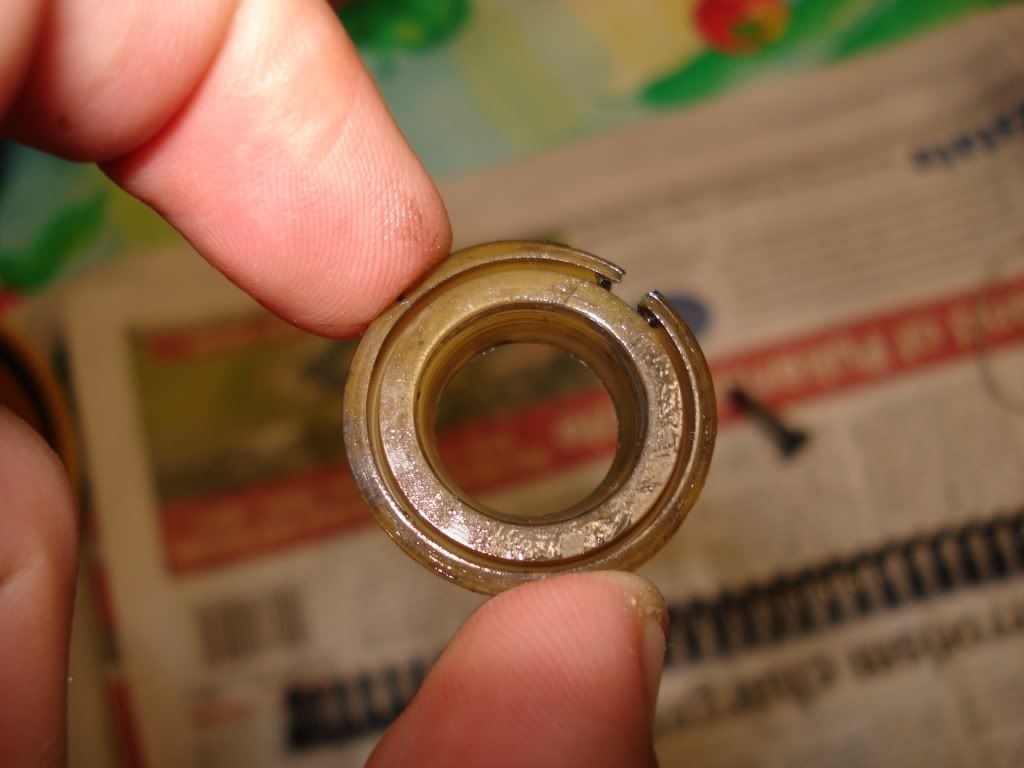
I took the rifle to an airgun specialist who replaced the spring, piston seal, and breech bolt (I had mangled the bolt trying to undo it myself).  The old piston seal had a large knotch out of it - check out the pictures.  This likely happened when the first spring was crudely replaced under warranty.  I heard somewhere that if the trigger is not pulled and lowered out of the action properly, sliding the piston out of the action will catch on the trigger sear and tear the piston seal.  Not good.

Once repaired the rifle has continued to operate very accurately and reliably.  This Gamo has had many thousands of pellets fired though it.


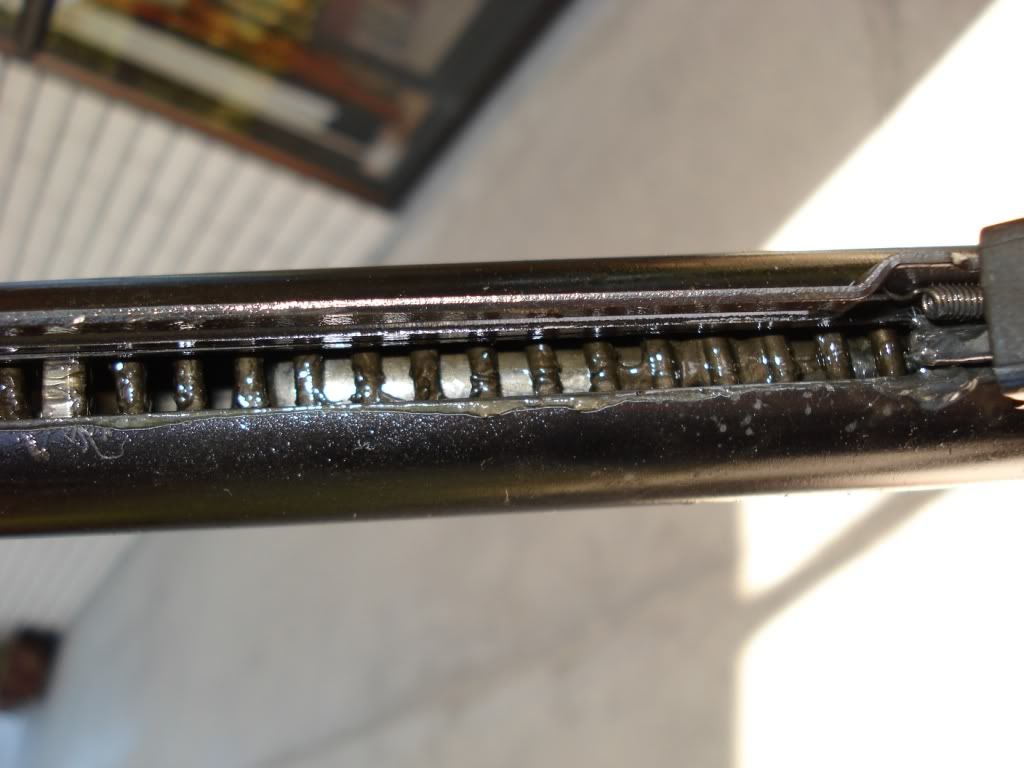
Showing the broken mainspring - see the broken spring end at the right of the channel:


Picture of a good mainspring - symmetrical coils:


After getting the Airgun specialist to fix the Gamo warranty contractor's botch up, they gave me back the piston seal they had to remove:


Tuesday 21 May 2013

Scoping the M1A / M14 / M305 / M14S


Anyone who has done a fair amount of reading on these rifles know that scoping them can be the source of extreme vexation. Tears and frustration abound with the cheap aluminium mounts. The soft aluminium mounts have proven time and again to fail sooner rather than later. This info is saturating the web and rife in the m14 section of canadiangunnutz (a wealth of norinco m14 knowledge, they’ve been importing shipments of these rifles) & the m14tfl forums.

The most widely agreed upon scope mounts that actually do the job are the steel Smith Enterprise, Sadlak, and the ARMS 18 mounts. These mounts run at approx $255, $275 and 184 US dollars respectively which = big bucks in NZ $$ terms, especially with postage, but if you want something that actually works they have earned their reputation by doing the hard yards over the years. You will read good things about these mounts everywhere. However, I didn't want to pay that sort of money for a scope mount and getting them out of the US isn't easy. 

However there are cheaper alternative steel mounts (steel being critical here).  There's the Leatherwood M14MT and the Promag PM081A (Arms 18 copy) which run at about $130 and $120 respectively.

Most decent scope mounts require the removal of the factory stripper clip guide which can be a real headache depending on how tight it fits.  Mine needed some solid hitting.  First drive the roll pin out that passes through the guide into the receiver.  Next drive the stripper clip guide off from right to left (away from the oprod) as apparently the dovetails are directionally tapered.  


Smith Enterprise M14 / M1A mount below

Sadlak Steel M14 / M1A scope mount below (they also make titanium and aluminium versions.  I would not be keen on aluminium myself).


Arms 18 M14 / M1A mount below


Leatherwood M14 / M1A scope mount M14MT below


Promag PM081A M14 / M1A scope mount below


After sifting the web, and I mean really sifting, I decided on the steel copy of the ARMS 18 mount by Promag, model - PMO81A. Promag make another mount more akin to the Sadlak called the PMO81 but it is not to be confused with the ARMS 18 copy.  The ARMS 18 mount is the lowest mount available (you can still remove the bolt of course) and praised for being one of the few that hold up. Promag's PM081A is a steel copy and likewise attempts to ride on that success.


After a bit of shooting I found that the Promag mount was pointing off centre to the left, so removed the mount and the mount bolt so I could hold it against the receiver and eye the holes up. In so doing I found the mount's side bolt hole didn't line up with the receiver hole by about a millimeter to one side. So when originally installing the mount the mount's keys wouldn't have lined up quite right with the receiver slots. The reason I didn't see this originally was the mount's side bolt retainer clip means the bolt is held in the mount, so naturally you line the bolt up with the receiver hole and screw it down assuming it's all good. A bit of filing with a round file sorted the side bolt hole.

After remounting I found the clearance between the back of the mount and the stripper clip dovetails to be about half a millimeter, closer than before which was good.

I mounted a bushnell 3200 10x40 for testing purposes and proceeded to get about A4 page accuracy at 100m with cheapo Barnaul and Belmont ammunition. The Belmont seemed to be slightly more accurate. While zeroing I found the mount was still off centre, to a lesser degree than before re-mounting, but the scope had sufficient adjustment to compensate for it. The mount is solid, no two ways about it.

I'll probably end up mounting a red dot as current accuracy with the cheapo ammo doesn't warrant a scope. I could spend a bit of effort finding ammo it likes etc but am not too fussed really.

A couple of points about the rifle, the front sight is slightly canted to the right and the oprod guide is loose. Neither is all that significant. I still managed to get the irons lined up ok. Loose oprod guides apparently affect accuracy but to what degree I wouldn’t know. In regards to function they aren't a worry.